This tutorial teaches you how to make a video from still images. So, if you want to create a video from your favorite photos, you have landed on the right page.
Keep reading this tutorial to learn how to create amazing videos for your friends or loved ones by adding visually appealing effects and audio.
If you are looking for a better way to display your pictures than in a photo album or a social media feed, you’ve come to the right place.
An animated video filled with your pictures will be a much more enticing method of showcasing your vacation pics, recent photoshoot photos, or portfolio. The reason is simple.
An animated video would be filled with motion, effects, and – should you wish – even music. But before you sit down to create a video from still images, there are just a few guidelines you need to know.
Also Read: How To Sort Spotify Playlists By Date Added, Release Date, etc.
Tips for creating video from still images
- Make sure to incorporate not just still images but videos as well. Granted, an animated movie is reason enough for the viewer to be involved, but the usage of videos will make your project much more dynamic. It doesn’t matter whether you are making a personal movie or a business-related one – any project will benefit from using videos along with photos.
- Regarding effects and embellishments, stick to the rule “Less is more.” Users who make a video from still images for the first time might be dangerously tempted to try every effect available within the program of their choice. Do not make this mistake. If you go with too many eye-catching effects or flamboyant decorations, you might take the attention away from the images featured in the video. So, pick only a few effect and transition options to make your project clear and pleasantly minimalistic.
- Define the limits of the running time of your still image video. Pros in the field consider 5 to 8 minutes more than enough. A video of this duration will quickly grasp and hold the attention of your viewers. Another tip – dedicate 3 to 5 seconds to every shot so the audience can have a good look at it.
- Find the right tool for the job. Not every program is suitable for making videos with still images. Some are overly complex. Others have very few features and can’t produce a visually gripping result. Consider going with SmartSHOW 3D. This slideshow-making software strikes a cozy balance between being feature-rich while remaining reasonably intuitive and easy to grasp. Look at how this software can make a still-image movie.
Also Read: How to Create a Poll in Gmail Email for Free
How to Make a Video from Your Still Images
Now, let’s make a video from still images using SmartSHOW 3D.
1. Pick the Project Type
Once you run SmartSHOW 3D, you’ll be given a choice of making a video from scratch or building one using a premade template.
The former option grants you total creative freedom over your project, while the latter will give you access to dozens of premade templates you can use to make a movie in under 5 minutes.
Also Read: How to Download All Images From a Subreddit
2. Add Your Media Files
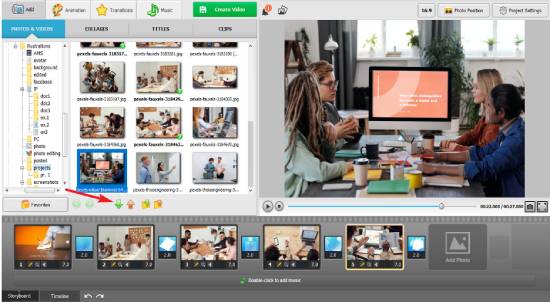
The next step is the same, whichever option you pick – you need to fill your project with pictures and videos. There is no limit to how many files you can use, but remember the tip above and go with only the necessary pictures and videos.
Also Read: How To Listen To Twitch Audio-Only In The Background
3. Spice Up Your Project with Effects
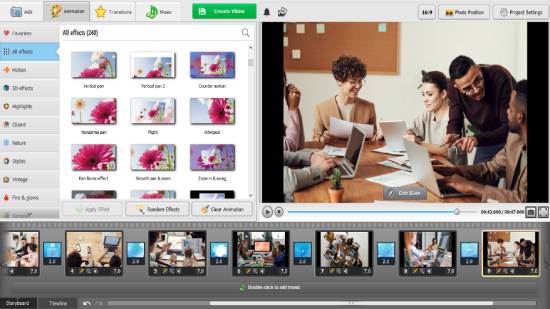
SmartSHOW 3D has an immense library, including motion, 3D, nature, and many more. You can easily apply these effects with a single drag and drop.
What’s more, you can effortlessly animate your still images yourself – the software provides a custom animation module where you can play with how your images move to your heart’s desire.
Besides, the cinemagraph creation feature lets you animate only a specific part of your photo while leaving the rest still. This feature works well with clouds in the sky, water, steam, hair, fabrics, etc.
Also Read: How To Flip An Image in Chrome [Rotate An Image In Chrome]
4. Throw In a Soundtrack
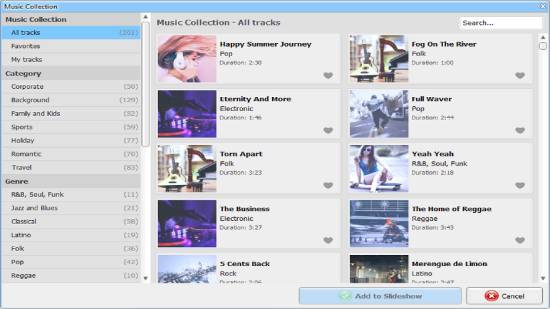
A still image video is not complete without a soundtrack. You can use a track or go with one from the software’s massive library.
If you have a few behind-the-scenes stories or want to accompany your movie with narration, use the built-in tool to record your voice comments and seamlessly work them into the project.
Also Read: How to Change YouTube Double-Tap Skip Time
5. Export Your Creation
When you are satisfied with your movie, save it in whatever format you need. SmartSHOW 3D offers over 30 options that range from a video for TV to a video burnt to DVD. Just a few clicks, and you have a perfectly optimized version of your movie on your hard drive.
Also Read: How To See When a Twitter Account Was Created
Wrapping Up
Want more tips and a more thorough guide on the matter? Then, learn how to create a video from still images in SmartSHOW 3D.
And in the meantime, browse through your photos to cull the ones that would be the perfect material for your first-ever still image movie.


