In this article, you’ll learn how to change the name of a Facebook group. Facebook has been the most popular social media network globally for over a decade, but not anymore. People rapidly migrate to other social media platforms like Instagram, Twitter, etc.
Facebook groups keep youngsters hooked on the platform, giving them a space to collaborate with like-minded people. Instagram and Twitter do not have such features.
Over 100 million people use Facebook groups, and many brands use them to form a dedicated community around their brand or service. The implications of Facebook groups are endless.
You might want to change the name of a Facebook group for various reasons. Maybe the group’s purpose has changed, or whatever the reason, you are at the right place for that. So, without further ado, let’s begin with our article!
How to Change the Name of a Facebook Group Easily
Changing a Facebook group on a computer or your smartphone is as easy as it gets, but there are a few requirements to fulfill before you can do so.
Firstly, you should be the admin of the Facebook group you want to change the name of.
Secondly, the group should not have more than 5,000 members. If a Facebook group has more than 5,000 members, you cannot change its name, as Facebook does not allow this.
Follow these steps to change the name of a Facebook group on your computer:
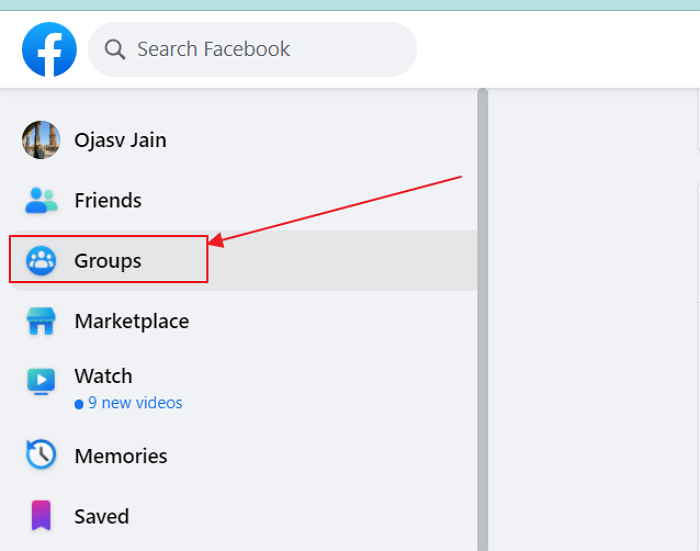
1. Visit Facebook.com; select Open Groups from the left pane on the homepage.
2. In the groups section, look for the Facebook group you want to change the name of and click on it.
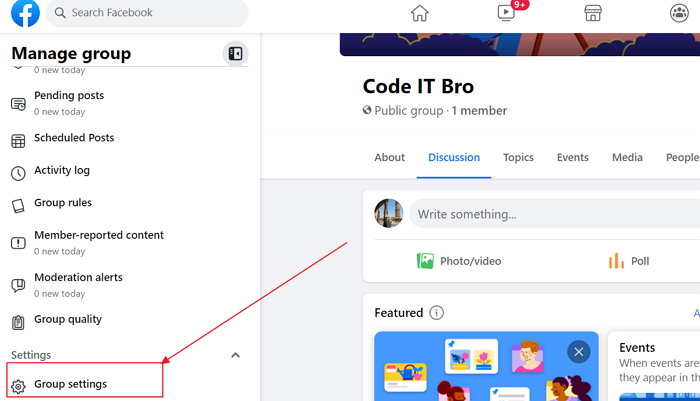
3. Look for Group settings in the left pane on the group page.
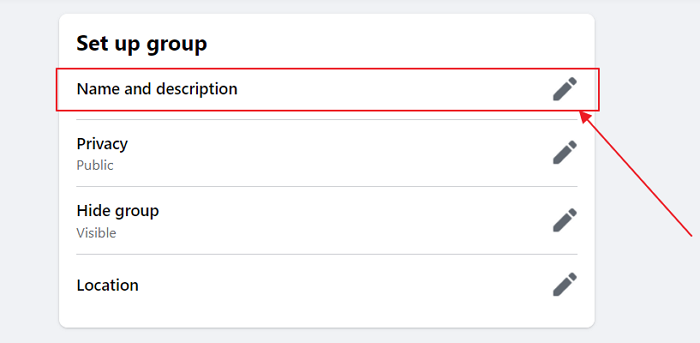
4. Now, in the Set Up Group section, click the edit icon near the name and description option.
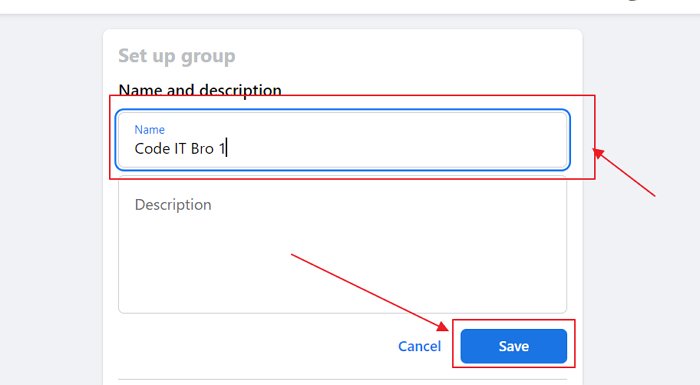
5. Now, you can type in a new name for your Facebook group and click on Save to save the new name.
Let’s now look at how to change the Facebook Group name on the Facebook App.
Change Facebook Group Name On the Facebook App
The Facebook App is more widely used to manage Facebook groups as it is easy to use, and you can access it more quickly on your smartphone than on your computer, and everywhere. Let’s look at the steps to change a Facebook Group name on the Facebook app:
1. Open the Facebook App and then the triple-line menu from the top right.
2. Select the Groups option below your profile name in the menu.
3. Select the group you want to change the name of in the Groups you manage section.
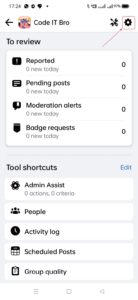
4. On the group homepage, click on the shield icon in the top right corner, then open settings by clicking on the gear icon in the top right corner.
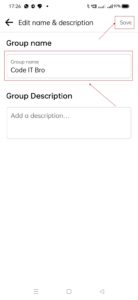
5. Now, click on the name and description in the basic group info section in the settings.
6. You can change the group name and description and click the Save button in the top-right corner to approve the changes.
Frequently Asked Questions
Can I Change A Facebook Group Name After 5,000 Members?
You cannot change a Facebook Group name after achieving 5,000 members; Facebook does not allow you to do so, as group names are part of the members’ identity.
Changing the group names can cause large-scale confusion for the members. Facebook also wants to prevent group admins from exercising excessive control, as groups are communities run by members.
Can A Group Moderator Change the Facebook Group Name?
A Facebook group moderator cannot change the group name as the privileges are limited only to group admins.
Moderators of Facebook groups can only approve posts, delete them, approve membership requests, ban or temporarily restrict members, and perform other functions.
Summary
This was all for our article on changing the name of a Facebook group. A Facebook group is an excellent tool for forming a community and meeting new people online.
As a group admin, one should take due note of all that happens in the group and prevent anything that spoils the experience of other group members. We hope you liked the article. Please make sure you share this with everyone.

