Enhance your document efficiency by mastering the art of inserting checkboxes in Microsoft Word.
This post outlines a clear, step-by-step method for adding both interactive and static checkboxes to digital forms and printed lists.
Whether you’re building detailed forms or streamlining task lists, these straightforward techniques will refine your workflow and elevate the professionalism of your documents.
How To Add Checkboxes in MS Word
This article explains how to insert interactive checkboxes for digital documents and non-interactive checkboxes for printed versions in Microsoft Word.
With these tools, you can start using checkboxes in your forms, surveys, and lists with ease
Inserting Checkboxes For Printed Documents in MS Word
Follow these steps to insert checkboxes in Hardcopy documents:
Step 1: Place the cursor where you wish to add checkboxes.
Step 2: Make sure you’re on the Home Tab in the ribbon.
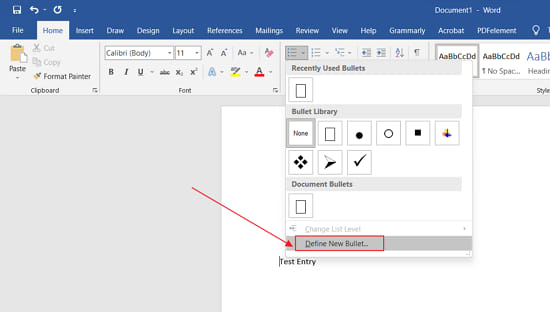
Step 3: Click the drop-down arrow to the right of the Bullet points button.
Step 4: Now, click on the Define new bullet option.
Step 6: Now, click on the Symbol option in the new bullet menu.
Step 7: Select the following symbol (In the attached screenshot) and click OK.
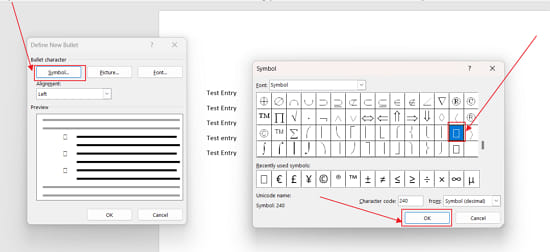
Now, you’ll see a hollow square as a bullet point; you can use this as a checkbox for the hard copy.
To add more checkboxes, click the Bullet button, and they will be added automatically (to get your usual bullet back, click the down arrow next to the Bullet button and choose the symbol you prefer).
In the future, you can select either the standard bullet or the checkbox from the menu instead of using the “Define New Bullet” dialog box.
Inserting an Interactive Checkbox in MS Word
You can tick interactive checkboxes in an MS Word document without obtaining a hard copy. Here’s how to insert an interactive Checkbox in MS Word:
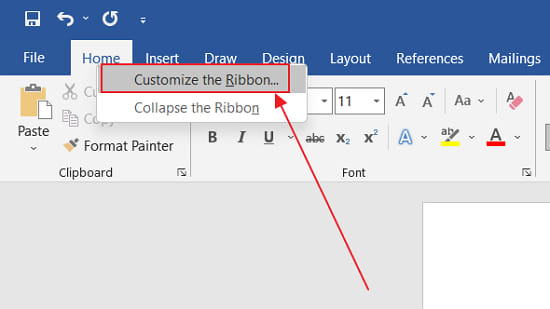
Step 1: Right-click on the File tab and click Customize the ribbon option.
Step 2: Choose Main Tab from the Customize the Ribbon menu.
Step 3: Select the Developer checkbox in the main tab’s subheadings.
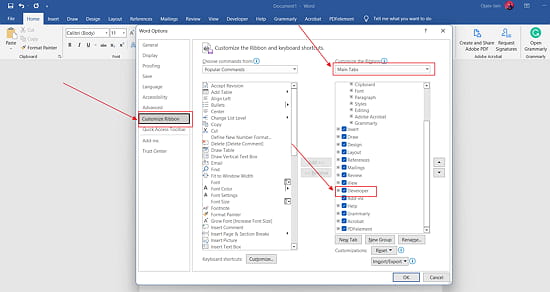
Step 4: To close the Customize the Ribbon menu, click OK.
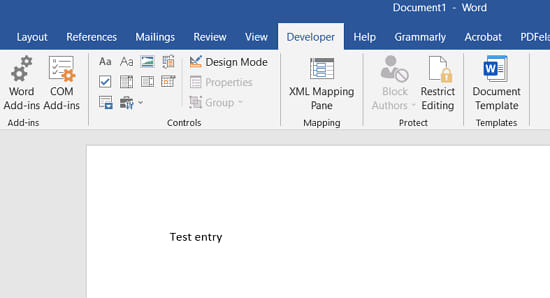
Step 5: Now, you’ll see an additional Developer Tab on the ribbon.
Step 6: Open the Developer tab and place the cursor on the list item where you want the checkbox inserted.
Step 7: Now, click on the Checkbox icon (as displayed in the screenshot) to add an interactive checkbox to a document in MS Word.
Also Read: How To Change The Name Of A Facebook Group
Customizing the Checked Symbol in the Checkbox
Click on the checkbox icon to create interactive and fillable checkboxes, depending on how many you require. When you check the box, the X sign will appear by default.
If you want to replace that symbol with, say, a (tick) sign, follow the steps:
Step 1: Go to the Controls options in the Developer tab and select the Properties option.
Step 2: If the Properties icon becomes blurry, check the box you inserted and then go there.
Step 3: The Checked symbol option is at the bottom of the Content Control Properties.
Step 4: Select the preferred sign for the checkbox by clicking the Change button.
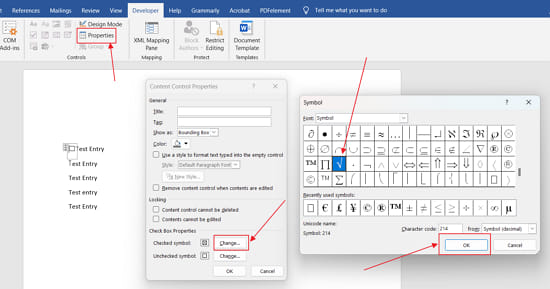
Step 5: To confirm the changes, click OK.
Conclusion
This guide showed you how to insert both printable and interactive checkboxes in Microsoft Word. For printed documents, you can use custom bullet symbols to create checkbox-style lists.
For digital forms, enabling the Developer tab gives you access to interactive checkboxes you can click to check or uncheck. You also learned how to customize the default checkmark symbol.
With these simple steps, you can create clean, functional checklists for any type of document. Found it useful? Share it with someone who might need it.
Frequently Asked Questions(FAQs)
How do you insert a checkable box in Word?
Turn on the Developer tab, then click Check Box Content Control to insert a clickable box.
How do I insert a fillable checkbox?
Go to the Developer tab, place your cursor, and select Check Box Content Control. It creates a checkbox that users can check digitally.
How do I insert a check box in Docs?
Highlight your list, right-click, and choose Checklist from the pop-up menu. This adds clickable checkboxes in Google Docs.
How do I insert a tick mark in Word?
Place your cursor, go to Insert > Symbol, choose a tick from the list, and click Insert. For more options, use fonts like Wingdings or Segoe UI Symbol.
What is the shortcut for checkbox in Word?
There’s no direct keyboard shortcut for inserting a checkbox in Word by default. However, you can create one:
- Go to File > Options > Customize Ribbon.
- Click Customize next to Keyboard shortcuts.
- Under Categories, select the Developer Tab.
- In Commands, choose CheckBoxContentControl.
- Assign your preferred shortcut, then click Assign.
Once set, you can insert checkboxes with a single keystroke.